How to Upload your Website using FileZilla FTP Client
Download and Install FileZilla
- Go to FileZilla download page and obtain the appropriate version for your system.
- Once you have downloaded FileZilla, install it.
- Double click the the file you have just downloaded, follow the instructions.
Before anything else you need the following information to upload a file to your site. You can get the needed information from your web host:
- name of the FTP server for your website – e.g. your host may tell you that your FTP host name is “ftp.example.com.au”
- user id or log-in user name for your FTP account
- password for your FTP account
- directory where you need to place your files so that they can be seen by a web browser visiting your site – e.g. your host may tell you to place files in sub directory called “www” or “public html” or even the default directory that you see when you log into your FTP
- port – it is possible that there’s no port number for your FTP server
Uploading a File to your Web Server
- Connect to your FTP server. There are two options on how to connect to your FTP server:
- using the quick connect bar
- using Site Manager
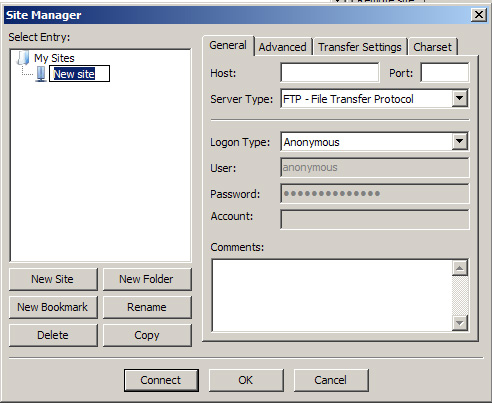
Click the “File” menu followed by the “Site Manager” item on that menu. A dialog box will appear.
Click the “New Site” button on that dialog box. Rename “New site” to the name you wish – this can be anything you wish. By default, the keyboard cursor would have been placed in the name portion of “New FTP site” allowing you to change the name immediately. If you have lost the cursor because you accidentally clicked somewhere else in the dialog box, you can get it back by simply clicking once on the name.
Under the tab “General”, enter the name of your FTP server in the “Host” input box. For example, if your web host told you that your FTP hostname is “ftp.example.com.au”, enter “ftp.example.com.au” into the space provided.
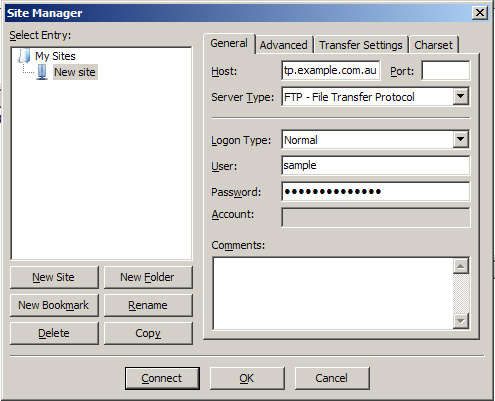
Leave the “Port” and the “Servertype” entry boxes.Select “Normal” from the drop down list box for “Logon Type”.
Fill in your your username or login name into the User field and your password in the Password field. Note: This information is automatically saved onto your computer and will be re-used the next time you run FileZilla, so you do not have to re-enter them again. (It also means that you should not use FileZilla in this way on computers that others may have access to, such as those found in an Internet cafe or a public library.)
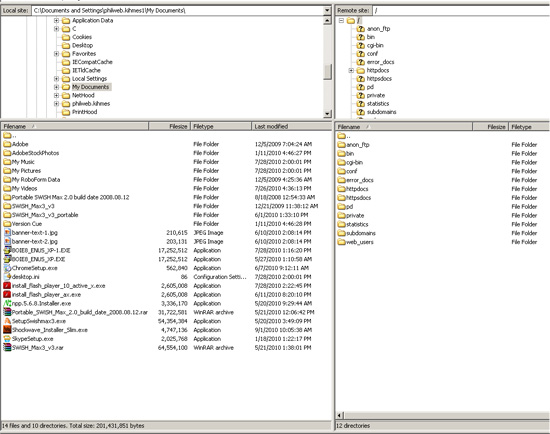
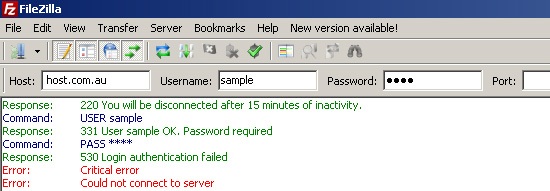
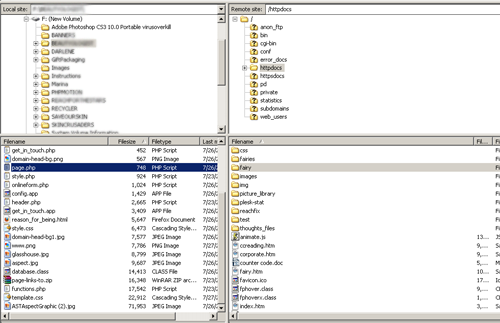
Click Connect button to login to your ftp server. If it is successful, you will see a directory listing of your website’s account in the right hand side of the FileZilla window. The left hand side of the FileZilla window shows the directories and files on your own computer. Otherwise an error message will show that you can not connect to the server. You have to check if the all information you entered are correct. Successful:
Error:
- Locate the file that you wish to upload in the left window pane (“Local Site”). Both window panes behave mostly like a Windows Explorer windows, so navigating them should not be hard. Once you have located the file you wish to upload, say “page.php”, doubleclick it to upload it to your website. You can also drag that file from the left window pane to the right window pane. The file will be uploaded to the folder that is currently open on the right window pane, so make sure you have changed to the directory you want before dragging the file there.
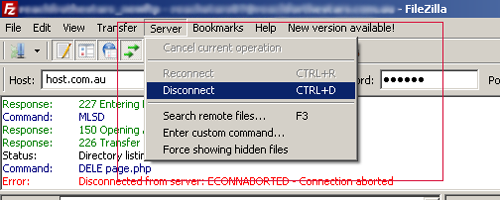
- As FileZilla upload your file to your site, you should be able to see the upload progress in the bottommost window pane in FileZilla. When the upload has completed, you can disconnect from your website. Do this by clicking the “Server” and then “Disconnect” item.

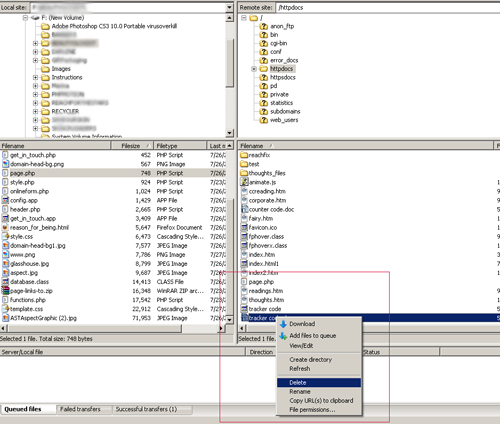
- If you want to delete a file in your server, just locate the file in the right window pane, then right click and click Delete or you can press Delete in your keyboard.